开始使用 MCP
欢迎踏上 Model Context Protocol (MCP) 的第一步!无论您是 MCP 的新手还是希望深入了解的开发者,本指南将带您完成基本的设置和开发流程。您将发现 MCP 如何实现 AI 模型与应用程序之间的无缝集成,并学习如何快速准备环境以构建和测试基于 MCP 的解决方案。
简而言之:如果您开发 AI 应用程序,您可能知道可以为 LLM(大型语言模型)添加工具和其他资源,以使其更智能。然而,如果您将这些工具和资源放在服务器上,无论是否使用 LLM,任何客户端都可以使用这些应用程序和服务器功能。
概述
本课程提供了设置 MCP 环境和构建首个 MCP 应用程序的实用指导。您将学习如何设置必要的工具和框架,构建基本的 MCP 服务器,创建主机应用程序,并测试您的实现。
Model Context Protocol (MCP) 是一个开放协议,标准化了应用程序向 LLM 提供上下文的方式。可以将 MCP 想象成 AI 应用程序的 USB-C 接口——它提供了一种标准化的方式,将 AI 模型连接到不同的数据源和工具。
学习目标
完成本课程后,您将能够:
- 为 C#、Java、Python、TypeScript 和 Rust 设置 MCP 开发环境
- 构建和部署具有自定义功能(资源、提示和工具)的基本 MCP 服务器
- 创建连接到 MCP 服务器的主机应用程序
- 测试和调试 MCP 实现
设置 MCP 环境
在开始使用 MCP 之前,准备好开发环境并了解基本工作流程非常重要。本节将指导您完成初始设置步骤,以确保顺利开始使用 MCP。
前置条件
在开始 MCP 开发之前,请确保您具备以下条件:
- 开发环境:支持您选择的编程语言(C#、Java、Python、TypeScript 或 Rust)
- IDE/编辑器:Visual Studio、Visual Studio Code、IntelliJ、Eclipse、PyCharm 或其他现代代码编辑器
- 包管理工具:NuGet、Maven/Gradle、pip、npm/yarn 或 Cargo
- API 密钥:用于您计划在主机应用程序中使用的 AI 服务
基本 MCP 服务器结构
一个 MCP 服务器通常包括:
- 服务器配置:设置端口、认证及其他配置
- 资源:提供给 LLM 的数据和上下文
- 工具:模型可以调用的功能
- 提示:用于生成或组织文本的模板
以下是 TypeScript 的一个简化示例:
import { Server, Tool, Resource } from "@modelcontextprotocol/typescript-server-sdk";

// Create a new MCP server
const server = new Server({
  port: 3000,
  name: "Example MCP Server",
  version: "1.0.0"
});

// Register a tool
server.registerTool({
  name: "calculator",
  description: "Performs basic calculations",
  parameters: {
    expression: {
      type: "string",
      description: "The math expression to evaluate"
    }
  },
  handler: async (params) => {
    const result = eval(params.expression);
    return { result };
  }
});

// Start the server
server.start();
在上述代码中,我们:
- 从 MCP TypeScript SDK 导入必要的类。
- 创建并配置一个新的 MCP 服务器实例。
- 注册一个自定义工具(
calculator)及其处理函数。 - 启动服务器以监听传入的 MCP 请求。
测试和调试
在开始测试 MCP 服务器之前,了解可用工具和调试的最佳实践非常重要。有效的测试可以确保服务器按预期运行,并帮助您快速识别和解决问题。以下部分概述了验证 MCP 实现的推荐方法。
MCP 提供了一些工具来帮助您测试和调试服务器:
- Inspector 工具:这个图形界面允许您连接到服务器并测试工具、提示和资源。
- curl:您也可以使用命令行工具如 curl 或其他能够创建和运行 HTTP 命令的客户端连接到服务器。
使用 MCP Inspector
MCP Inspector 是一个可视化测试工具,可帮助您:
- 发现服务器功能:自动检测可用的资源、工具和提示
- 测试工具执行:尝试不同的参数并实时查看响应
- 查看服务器元数据:检查服务器信息、架构和配置
# ex TypeScript, installing and running MCP Inspector
npx @modelcontextprotocol/inspector node build/index.js
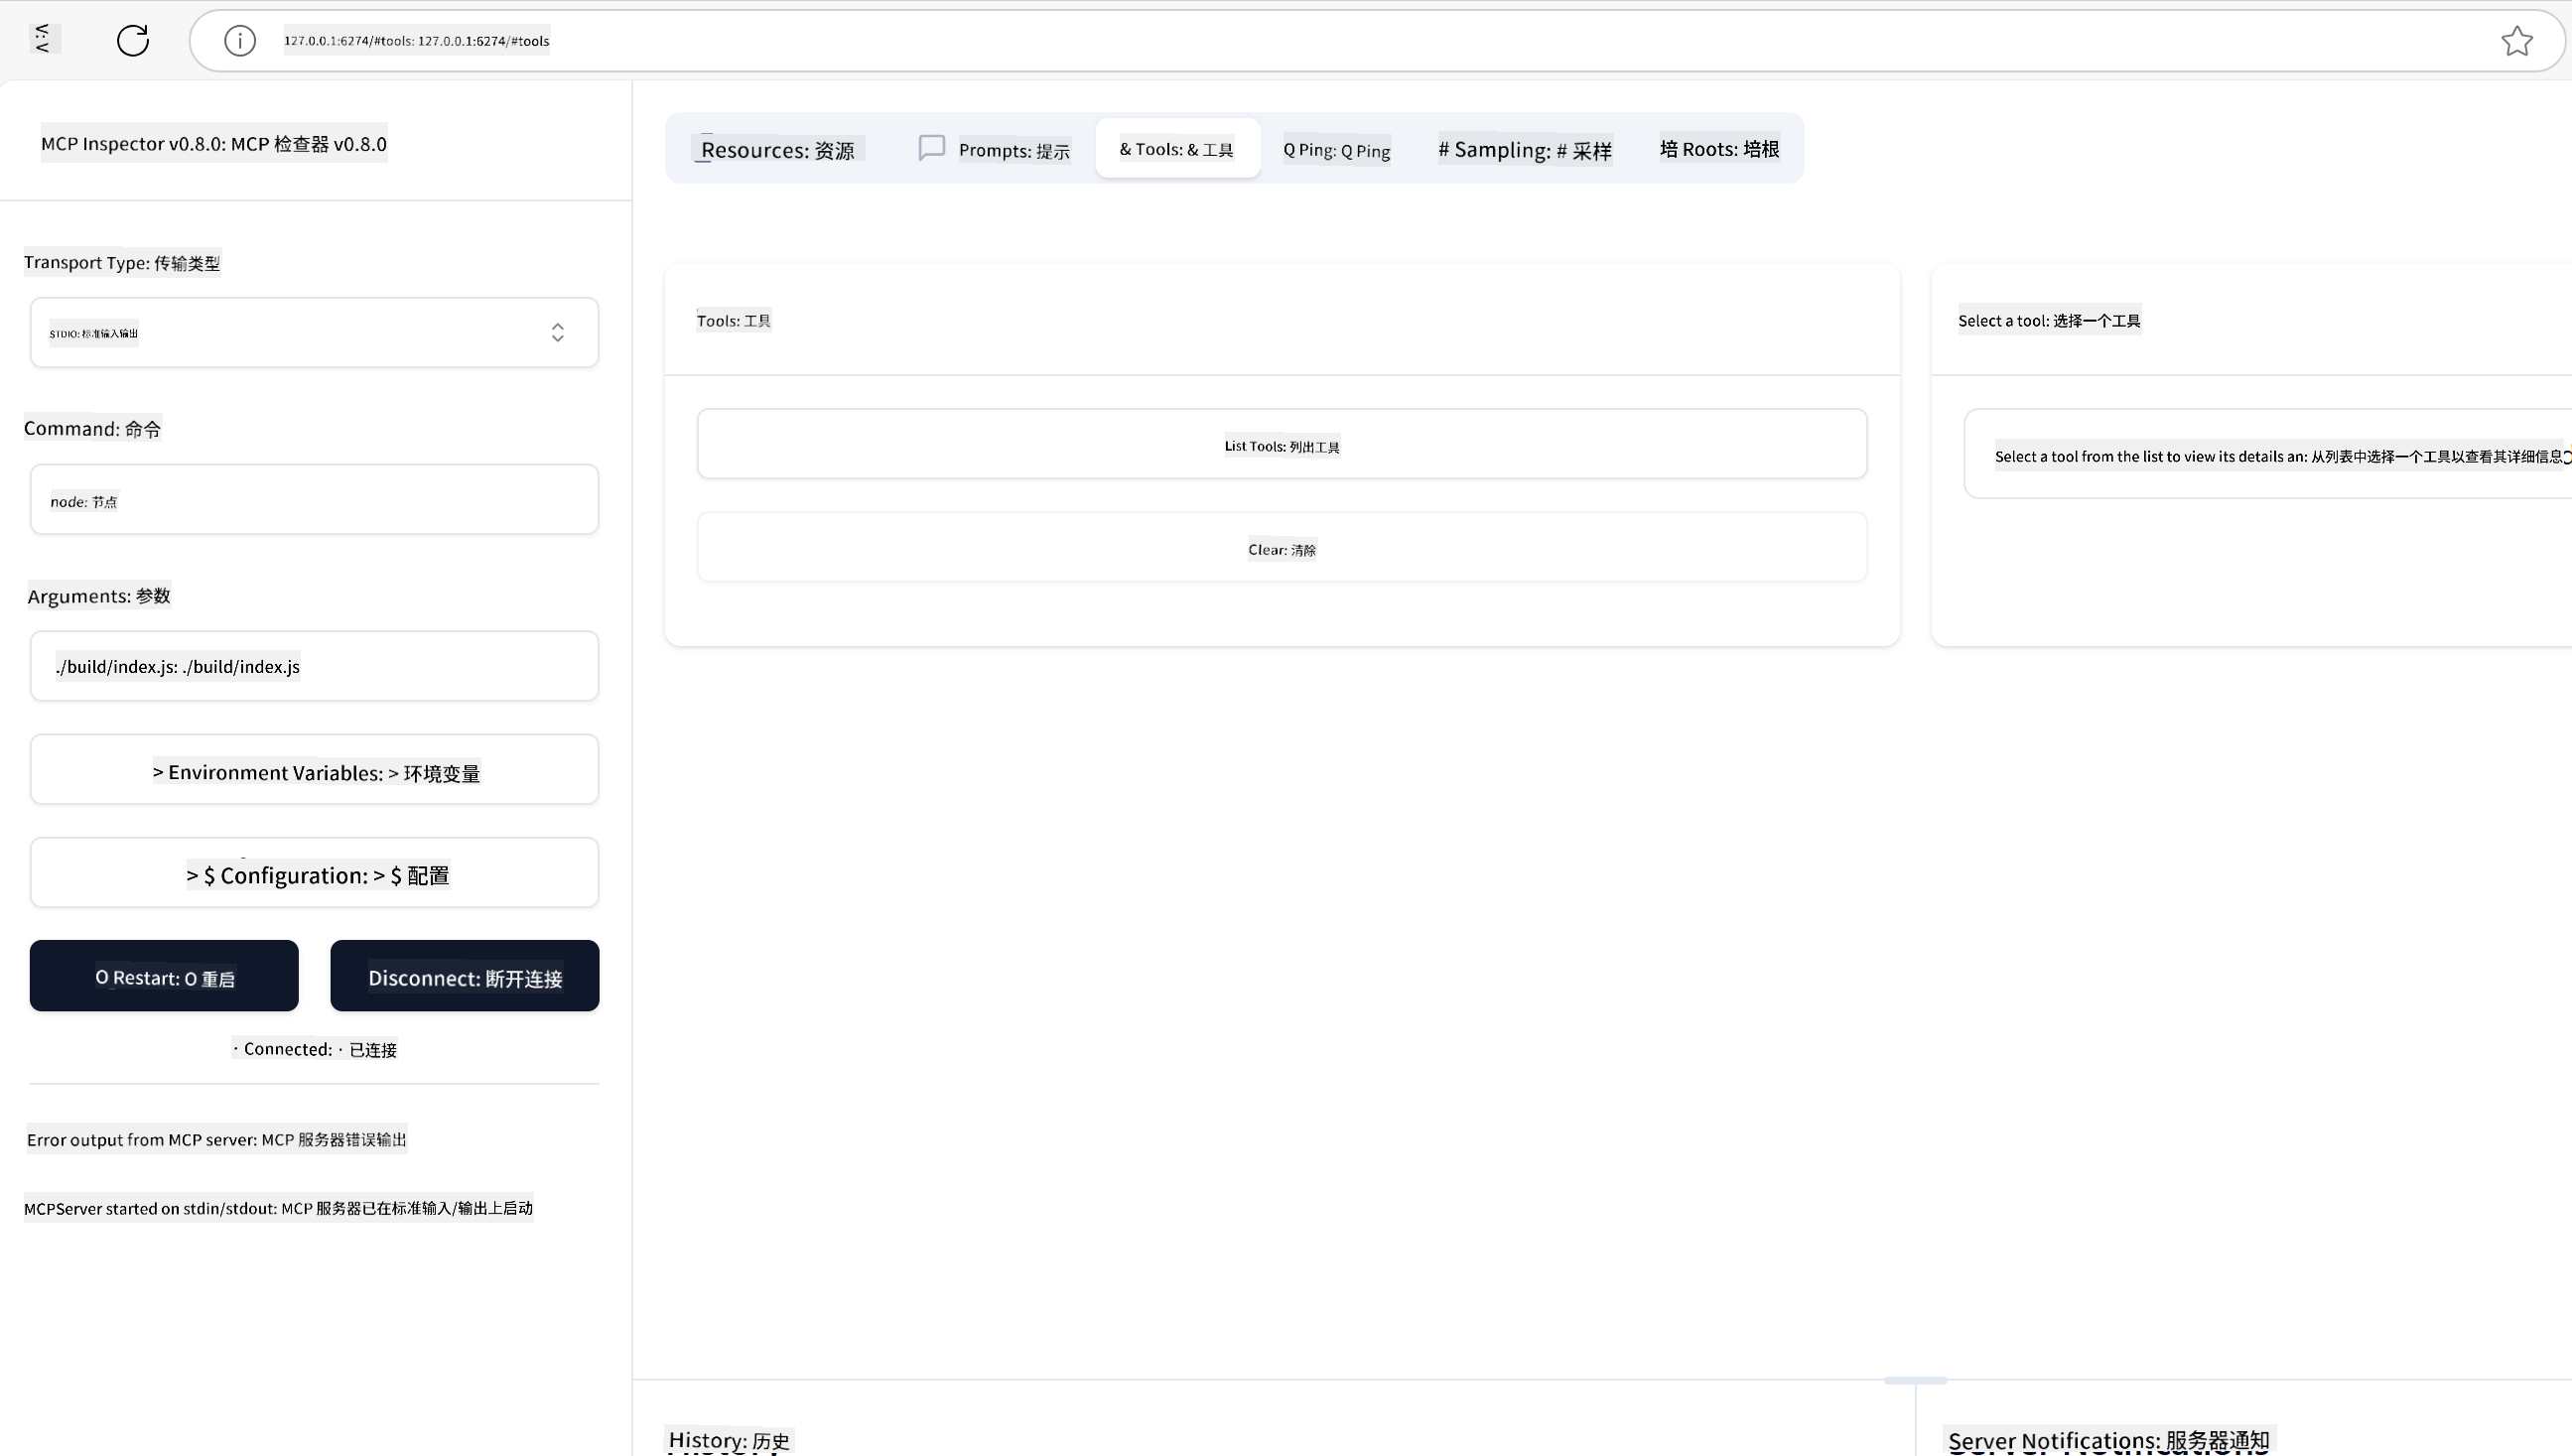
运行上述命令后,MCP Inspector 将在您的浏览器中启动一个本地网页界面。您可以看到一个仪表板,显示已注册的 MCP 服务器及其可用工具、资源和提示。界面允许您交互式测试工具执行、检查服务器元数据并查看实时响应,从而更轻松地验证和调试 MCP 服务器实现。
以下是界面可能的样子:
常见设置问题及解决方案
| 问题 | 可能的解决方案 |
|---|---|
| 连接被拒绝 | 检查服务器是否正在运行以及端口是否正确 |
| 工具执行错误 | 检查参数验证和错误处理 |
| 认证失败 | 验证 API 密钥和权限 |
| 架构验证错误 | 确保参数与定义的架构匹配 |
| 服务器无法启动 | 检查端口冲突或缺少依赖项 |
| CORS 错误 | 配置正确的 CORS 头以支持跨域请求 |
| 认证问题 | 验证令牌的有效性和权限 |
本地开发
对于本地开发和测试,您可以直接在机器上运行 MCP 服务器:
- 启动服务器进程:运行您的 MCP 服务器应用程序
- 配置网络:确保服务器可以通过预期端口访问
- 连接客户端:使用本地连接 URL,例如
http://localhost:3000
# Example: Running a TypeScript MCP server locally
npm run start
# Server running at http://localhost:3000
构建您的第一个 MCP 服务器
我们在之前的课程中已经介绍了核心概念,现在是时候将这些知识付诸实践了。
服务器可以做什么
在开始编写代码之前,让我们回顾一下服务器的功能:
一个 MCP 服务器可以:
- 访问本地文件和数据库
- 连接到远程 API
- 执行计算
- 集成其他工具和服务
- 提供用户交互界面
很好,现在我们知道服务器可以做什么了,开始编写代码吧。
练习:创建服务器
要创建服务器,您需要完成以下步骤:
- 安装 MCP SDK。
- 创建项目并设置项目结构。
- 编写服务器代码。
- 测试服务器。
-1- 创建项目
TypeScript
# Create project directory and initialize npm project
mkdir calculator-server
cd calculator-server
npm init -y
Python
# Create project dir
mkdir calculator-server
cd calculator-server
# Open the folder in Visual Studio Code - Skip this if you are using a different IDE
code .
.NET
dotnet new console -n McpCalculatorServer
cd McpCalculatorServer
Java
对于 Java,请创建一个 Spring Boot 项目:
curl https://start.spring.io/starter.zip \
  -d dependencies=web \
  -d javaVersion=21 \
  -d type=maven-project \
  -d groupId=com.example \
  -d artifactId=calculator-server \
  -d name=McpServer \
  -d packageName=com.microsoft.mcp.sample.server \
  -o calculator-server.zip
解压 zip 文件:
unzip calculator-server.zip -d calculator-server
cd calculator-server
# optional remove the unused test
rm -rf src/test/java
将以下完整配置添加到您的 pom.xml 文件中:
<?xml version="1.0" encoding="UTF-8"?>
<project xmlns="http://maven.apache.org/POM/4.0.0"
    xmlns:xsi="http://www.w3.org/2001/XMLSchema-instance"
    xsi:schemaLocation="http://maven.apache.org/POM/4.0.0 http://maven.apache.org/xsd/maven-4.0.0.xsd">
    <modelVersion>4.0.0</modelVersion>

    <!-- Spring Boot parent for dependency management -->
    <parent>
        <groupId>org.springframework.boot</groupId>
        <artifactId>spring-boot-starter-parent</artifactId>
        <version>3.5.0</version>
        <relativePath />
    </parent>

    <!-- Project coordinates -->
    <groupId>com.example</groupId>
    <artifactId>calculator-server</artifactId>
    <version>0.0.1-SNAPSHOT</version>
    <name>Calculator Server</name>
    <description>Basic calculator MCP service for beginners</description>

    <!-- Properties -->
    <properties>
        <java.version>21</java.version>
        <maven.compiler.source>21</maven.compiler.source>
        <maven.compiler.target>21</maven.compiler.target>
    </properties>

    <!-- Spring AI BOM for version management -->
    <dependencyManagement>
        <dependencies>
            <dependency>
                <groupId>org.springframework.ai</groupId>
                <artifactId>spring-ai-bom</artifactId>
                <version>1.0.0-SNAPSHOT</version>
                <type>pom</type>
                <scope>import</scope>
            </dependency>
        </dependencies>
    </dependencyManagement>

    <!-- Dependencies -->
    <dependencies>
        <dependency>
            <groupId>org.springframework.ai</groupId>
            <artifactId>spring-ai-starter-mcp-server-webflux</artifactId>
        </dependency>
        <dependency>
            <groupId>org.springframework.boot</groupId>
            <artifactId>spring-boot-starter-actuator</artifactId>
        </dependency>
        <dependency>
         <groupId>org.springframework.boot</groupId>
         <artifactId>spring-boot-starter-test</artifactId>
         <scope>test</scope>
      </dependency>
    </dependencies>

    <!-- Build configuration -->
    <build>
        <plugins>
            <plugin>
                <groupId>org.springframework.boot</groupId>
                <artifactId>spring-boot-maven-plugin</artifactId>
            </plugin>
            <plugin>
                <groupId>org.apache.maven.plugins</groupId>
                <artifactId>maven-compiler-plugin</artifactId>
                <configuration>
                    <release>21</release>
                </configuration>
            </plugin>
        </plugins>
    </build>

    <!-- Repositories for Spring AI snapshots -->
    <repositories>
        <repository>
            <id>spring-milestones</id>
            <name>Spring Milestones</name>
            <url>https://repo.spring.io/milestone</url>
            <snapshots>
                <enabled>false</enabled>
            </snapshots>
        </repository>
        <repository>
            <id>spring-snapshots</id>
            <name>Spring Snapshots</name>
            <url>https://repo.spring.io/snapshot</url>
            <releases>
                <enabled>false</enabled>
            </releases>
        </repository>
    </repositories>
</project>
Rust
mkdir calculator-server
cd calculator-server
cargo init
-2- 添加依赖项
现在您已经创建了项目,接下来添加依赖项:
TypeScript
# If not already installed, install TypeScript globally
npm install typescript -g

# Install the MCP SDK and Zod for schema validation
npm install @modelcontextprotocol/sdk zod
npm install -D @types/node typescript
Python
# Create a virtual env and install dependencies
python -m venv venv
venv\Scripts\activate
pip install "mcp[cli]"
Java
cd calculator-server
./mvnw clean install -DskipTests
Rust
cargo add rmcp --features server,transport-io
cargo add serde
cargo add tokio --features rt-multi-thread
-3- 创建项目文件
TypeScript
打开 package.json 文件并将内容替换为以下内容,以确保您可以构建和运行服务器:
{
  "name": "calculator-server",
  "version": "1.0.0",
  "main": "index.js",
  "type": "module",
  "scripts": {
    "start": "tsc && node ./build/index.js",
    "build": "tsc && node ./build/index.js"
  },
  "keywords": [],
  "author": "",
  "license": "ISC",
  "description": "A simple calculator server using Model Context Protocol",
  "dependencies": {
    "@modelcontextprotocol/sdk": "^1.16.0",
    "zod": "^3.25.76"
  },
  "devDependencies": {
    "@types/node": "^24.0.14",
    "typescript": "^5.8.3"
  }
}
创建一个 tsconfig.json 文件,内容如下:
{
  "compilerOptions": {
    "target": "ES2022",
    "module": "Node16",
    "moduleResolution": "Node16",
    "outDir": "./build",
    "rootDir": "./src",
    "strict": true,
    "esModuleInterop": true,
    "skipLibCheck": true,
    "forceConsistentCasingInFileNames": true
  },
  "include": ["src/**/*"],
  "exclude": ["node_modules"]
}
创建一个用于源代码的目录:
mkdir src
touch src/index.ts
Python
创建一个文件 server.py
touch server.py
.NET
安装所需的 NuGet 包:
dotnet add package ModelContextProtocol --prerelease
dotnet add package Microsoft.Extensions.Hosting
Java
对于 Java Spring Boot 项目,项目结构会自动创建。
Rust
对于 Rust,当您运行 cargo init 时会默认创建一个 src/main.rs 文件。打开文件并删除默认代码。
-4- 创建服务器代码
TypeScript
创建一个文件 index.ts 并添加以下代码:
import { McpServer, ResourceTemplate } from "@modelcontextprotocol/sdk/server/mcp.js";
import { StdioServerTransport } from "@modelcontextprotocol/sdk/server/stdio.js";
import { z } from "zod";

// Create an MCP server
const server = new McpServer({
  name: "Calculator MCP Server",
  version: "1.0.0"
});
现在您有了一个服务器,但它功能有限,让我们来改进它。
Python
# server.py
from mcp.server.fastmcp import FastMCP

# Create an MCP server
mcp = FastMCP("Demo")
.NET
using Microsoft.Extensions.DependencyInjection;
using Microsoft.Extensions.Hosting;
using Microsoft.Extensions.Logging;
using ModelContextProtocol.Server;
using System.ComponentModel;

var builder = Host.CreateApplicationBuilder(args);
builder.Logging.AddConsole(consoleLogOptions =>
{
    // Configure all logs to go to stderr
    consoleLogOptions.LogToStandardErrorThreshold = LogLevel.Trace;
});

builder.Services
    .AddMcpServer()
    .WithStdioServerTransport()
    .WithToolsFromAssembly();
await builder.Build().RunAsync();

// add features
Java
对于 Java,创建核心服务器组件。首先,修改主应用程序类:
src/main/java/com/microsoft/mcp/sample/server/McpServerApplication.java:
package com.microsoft.mcp.sample.server;

import org.springframework.ai.tool.ToolCallbackProvider;
import org.springframework.ai.tool.method.MethodToolCallbackProvider;
import org.springframework.boot.SpringApplication;
import org.springframework.boot.autoconfigure.SpringBootApplication;
import org.springframework.context.annotation.Bean;
import com.microsoft.mcp.sample.server.service.CalculatorService;

@SpringBootApplication
public class McpServerApplication {

    public static void main(String[] args) {
        SpringApplication.run(McpServerApplication.class, args);
    }

    @Bean
    public ToolCallbackProvider calculatorTools(CalculatorService calculator) {
        return MethodToolCallbackProvider.builder().toolObjects(calculator).build();
    }
}
创建计算器服务 src/main/java/com/microsoft/mcp/sample/server/service/CalculatorService.java:
package com.microsoft.mcp.sample.server.service;

import org.springframework.ai.tool.annotation.Tool;
import org.springframework.stereotype.Service;

/**
 * Service for basic calculator operations.
 * This service provides simple calculator functionality through MCP.
 */
@Service
public class CalculatorService {

    /**
     * Add two numbers
     * @param a The first number
     * @param b The second number
     * @return The sum of the two numbers
     */
    @Tool(description = "Add two numbers together")
    public String add(double a, double b) {
        double result = a + b;
        return formatResult(a, "+", b, result);
    }

    /**
     * Subtract one number from another
     * @param a The number to subtract from
     * @param b The number to subtract
     * @return The result of the subtraction
     */
    @Tool(description = "Subtract the second number from the first number")
    public String subtract(double a, double b) {
        double result = a - b;
        return formatResult(a, "-", b, result);
    }

    /**
     * Multiply two numbers
     * @param a The first number
     * @param b The second number
     * @return The product of the two numbers
     */
    @Tool(description = "Multiply two numbers together")
    public String multiply(double a, double b) {
        double result = a * b;
        return formatResult(a, "*", b, result);
    }

    /**
     * Divide one number by another
     * @param a The numerator
     * @param b The denominator
     * @return The result of the division
     */
    @Tool(description = "Divide the first number by the second number")
    public String divide(double a, double b) {
        if (b == 0) {
            return "Error: Cannot divide by zero";
        }
        double result = a / b;
        return formatResult(a, "/", b, result);
    }

    /**
     * Calculate the power of a number
     * @param base The base number
     * @param exponent The exponent
     * @return The result of raising the base to the exponent
     */
    @Tool(description = "Calculate the power of a number (base raised to an exponent)")
    public String power(double base, double exponent) {
        double result = Math.pow(base, exponent);
        return formatResult(base, "^", exponent, result);
    }

    /**
     * Calculate the square root of a number
     * @param number The number to find the square root of
     * @return The square root of the number
     */
    @Tool(description = "Calculate the square root of a number")
    public String squareRoot(double number) {
        if (number < 0) {
            return "Error: Cannot calculate square root of a negative number";
        }
        double result = Math.sqrt(number);
        return String.format("√%.2f = %.2f", number, result);
    }

    /**
     * Calculate the modulus (remainder) of division
     * @param a The dividend
     * @param b The divisor
     * @return The remainder of the division
     */
    @Tool(description = "Calculate the remainder when one number is divided by another")
    public String modulus(double a, double b) {
        if (b == 0) {
            return "Error: Cannot divide by zero";
        }
        double result = a % b;
        return formatResult(a, "%", b, result);
    }

    /**
     * Calculate the absolute value of a number
     * @param number The number to find the absolute value of
     * @return The absolute value of the number
     */
    @Tool(description = "Calculate the absolute value of a number")
    public String absolute(double number) {
        double result = Math.abs(number);
        return String.format("|%.2f| = %.2f", number, result);
    }

    /**
     * Get help about available calculator operations
     * @return Information about available operations
     */
    @Tool(description = "Get help about available calculator operations")
    public String help() {
        return "Basic Calculator MCP Service\n\n" +
               "Available operations:\n" +
               "1. add(a, b) - Adds two numbers\n" +
               "2. subtract(a, b) - Subtracts the second number from the first\n" +
               "3. multiply(a, b) - Multiplies two numbers\n" +
               "4. divide(a, b) - Divides the first number by the second\n" +
               "5. power(base, exponent) - Raises a number to a power\n" +
               "6. squareRoot(number) - Calculates the square root\n" +
               "7. modulus(a, b) - Calculates the remainder of division\n" +
               "8. absolute(number) - Calculates the absolute value\n\n" +
               "Example usage: add(5, 3) will return 5 + 3 = 8";
    }

    /**
     * Format the result of a calculation
     */
    private String formatResult(double a, String operator, double b, double result) {
        return String.format("%.2f %s %.2f = %.2f", a, operator, b, result);
    }
}
生产环境可选组件:
创建启动配置 src/main/java/com/microsoft/mcp/sample/server/config/StartupConfig.java:
package com.microsoft.mcp.sample.server.config;

import org.springframework.boot.CommandLineRunner;
import org.springframework.context.annotation.Bean;
import org.springframework.context.annotation.Configuration;

@Configuration
public class StartupConfig {

    @Bean
    public CommandLineRunner startupInfo() {
        return args -> {
            System.out.println("\n" + "=".repeat(60));
            System.out.println("Calculator MCP Server is starting...");
            System.out.println("SSE endpoint: http://localhost:8080/sse");
            System.out.println("Health check: http://localhost:8080/actuator/health");
            System.out.println("=".repeat(60) + "\n");
        };
    }
}
创建健康检查控制器 src/main/java/com/microsoft/mcp/sample/server/controller/HealthController.java:
package com.microsoft.mcp.sample.server.controller;

import org.springframework.http.ResponseEntity;
import org.springframework.web.bind.annotation.GetMapping;
import org.springframework.web.bind.annotation.RestController;
import java.time.LocalDateTime;
import java.util.HashMap;
import java.util.Map;

@RestController
public class HealthController {

    @GetMapping("/health")
    public ResponseEntity<Map<String, Object>> healthCheck() {
        Map<String, Object> response = new HashMap<>();
        response.put("status", "UP");
        response.put("timestamp", LocalDateTime.now().toString());
        response.put("service", "Calculator MCP Server");
        return ResponseEntity.ok(response);
    }
}
创建异常处理器 src/main/java/com/microsoft/mcp/sample/server/exception/GlobalExceptionHandler.java:
package com.microsoft.mcp.sample.server.exception;

import org.springframework.http.HttpStatus;
import org.springframework.http.ResponseEntity;
import org.springframework.web.bind.annotation.ExceptionHandler;
import org.springframework.web.bind.annotation.RestControllerAdvice;

@RestControllerAdvice
public class GlobalExceptionHandler {

    @ExceptionHandler(IllegalArgumentException.class)
    public ResponseEntity<ErrorResponse> handleIllegalArgumentException(IllegalArgumentException ex) {
        ErrorResponse error = new ErrorResponse(
            "Invalid_Input",
            "Invalid input parameter: " + ex.getMessage());
        return new ResponseEntity<>(error, HttpStatus.BAD_REQUEST);
    }

    public static class ErrorResponse {
        private String code;
        private String message;

        public ErrorResponse(String code, String message) {
            this.code = code;
            this.message = message;
        }

        // Getters
        public String getCode() { return code; }
        public String getMessage() { return message; }
    }
}
创建自定义横幅 src/main/resources/banner.txt:
_____      _            _       _
 / ____|    | |          | |     | |
| |     __ _| | ___ _   _| | __ _| |_ ___  _ __
| |    / _` | |/ __| | | | |/ _` | __/ _ \| '__|
| |___| (_| | | (__| |_| | | (_| | || (_) | |
 \_____\__,_|_|\___|\__,_|_|\__,_|\__\___/|_|

Calculator MCP Server v1.0
Spring Boot MCP Application
Rust
在 src/main.rs 文件顶部添加以下代码。这将导入 MCP 服务器所需的库和模块。
use rmcp::{
    handler::server::{router::tool::ToolRouter, tool::Parameters},
    model::{ServerCapabilities, ServerInfo},
    schemars, tool, tool_handler, tool_router,
    transport::stdio,
    ServerHandler, ServiceExt,
};
use std::error::Error;
计算器服务器将是一个简单的服务器,可以将两个数字相加。让我们创建一个结构体来表示计算器请求。
#[derive(Debug, serde::Deserialize, schemars::JsonSchema)]
pub struct CalculatorRequest {
    pub a: f64,
    pub b: f64,
}
接下来,创建一个结构体来表示计算器服务器。此结构体将包含工具路由器,用于注册工具。
#[derive(Debug, Clone)]
pub struct Calculator {
    tool_router: ToolRouter<Self>,
}
现在,我们可以实现 Calculator 结构体以创建服务器实例,并实现服务器处理程序以提供服务器信息。
#[tool_router]
impl Calculator {
    pub fn new() -> Self {
        Self {
            tool_router: Self::tool_router(),
        }
    }
}

#[tool_handler]
impl ServerHandler for Calculator {
    fn get_info(&self) -> ServerInfo {
        ServerInfo {
            instructions: Some("A simple calculator tool".into()),
            capabilities: ServerCapabilities::builder().enable_tools().build(),
            ..Default::default()
        }
    }
}
最后,我们需要实现主函数以启动服务器。此函数将创建 Calculator 结构体的实例并通过标准输入/输出提供服务。
#[tokio::main]
async fn main() -> Result<(), Box<dyn Error>> {
    let service = Calculator::new().serve(stdio()).await?;
    service.waiting().await?;
    Ok(())
}
服务器现在已设置为提供基本信息。接下来,我们将添加一个工具来执行加法。
-5- 添加工具和资源
通过添加以下代码来添加工具和资源:
TypeScript
server.tool(
  "add",
  { a: z.number(), b: z.number() },
  async ({ a, b }) => ({
    content: [{ type: "text", text: String(a + b) }]
  })
);

server.resource(
  "greeting",
  new ResourceTemplate("greeting://{name}", { list: undefined }),
  async (uri, { name }) => ({
    contents: [{
      uri: uri.href,
      text: `Hello, ${name}!`
    }]
  })
);
您的工具接收参数 a 和 b,并运行一个函数,生成如下形式的响应:
{
  contents: [{
    type: "text", content: "some content"
  }]
}
您的资源通过字符串 "greeting" 访问,并接收参数 name,生成与工具类似的响应:
{
  uri: "<href>",
  text: "a text"
}
Python
# Add an addition tool
@mcp.tool()
def add(a: int, b: int) -> int:
    """Add two numbers"""
    return a + b


# Add a dynamic greeting resource
@mcp.resource("greeting://{name}")
def get_greeting(name: str) -> str:
    """Get a personalized greeting"""
    return f"Hello, {name}!"
在上述代码中,我们:
- 定义了一个工具
add,接收两个整数参数a和p。 - 创建了一个名为
greeting的资源,接收参数name。
.NET
将以下内容添加到您的 Program.cs 文件:
[McpServerToolType]
public static class CalculatorTool
{
    [McpServerTool, Description("Adds two numbers")]
    public static string Add(int a, int b) => $"Sum {a + b}";
}
Java
工具已在前一步中创建。
Rust
在 impl Calculator 块中添加一个新工具:
#[tool(description = "Adds a and b")]
async fn add(
    &self,
    Parameters(CalculatorRequest { a, b }): Parameters<CalculatorRequest>,
) -> String {
    (a + b).to_string()
}
-6- 最终代码
让我们添加最后的代码以启动服务器:
TypeScript
// Start receiving messages on stdin and sending messages on stdout
const transport = new StdioServerTransport();
await server.connect(transport);
完整代码如下:
// index.ts
import { McpServer, ResourceTemplate } from "@modelcontextprotocol/sdk/server/mcp.js";
import { StdioServerTransport } from "@modelcontextprotocol/sdk/server/stdio.js";
import { z } from "zod";

// Create an MCP server
const server = new McpServer({
  name: "Calculator MCP Server",
  version: "1.0.0"
});

// Add an addition tool
server.tool(
  "add",
  { a: z.number(), b: z.number() },
  async ({ a, b }) => ({
    content: [{ type: "text", text: String(a + b) }]
  })
);

// Add a dynamic greeting resource
server.resource(
  "greeting",
  new ResourceTemplate("greeting://{name}", { list: undefined }),
  async (uri, { name }) => ({
    contents: [{
      uri: uri.href,
      text: `Hello, ${name}!`
    }]
  })
);

// Start receiving messages on stdin and sending messages on stdout
const transport = new StdioServerTransport();
server.connect(transport);
Python
# server.py
from mcp.server.fastmcp import FastMCP

# Create an MCP server
mcp = FastMCP("Demo")


# Add an addition tool
@mcp.tool()
def add(a: int, b: int) -> int:
    """Add two numbers"""
    return a + b


# Add a dynamic greeting resource
@mcp.resource("greeting://{name}")
def get_greeting(name: str) -> str:
    """Get a personalized greeting"""
    return f"Hello, {name}!"

# Main execution block - this is required to run the server
if __name__ == "__main__":
    mcp.run()
.NET
创建一个 Program.cs 文件,内容如下:
using Microsoft.Extensions.DependencyInjection;
using Microsoft.Extensions.Hosting;
using Microsoft.Extensions.Logging;
using ModelContextProtocol.Server;
using System.ComponentModel;

var builder = Host.CreateApplicationBuilder(args);
builder.Logging.AddConsole(consoleLogOptions =>
{
    // Configure all logs to go to stderr
    consoleLogOptions.LogToStandardErrorThreshold = LogLevel.Trace;
});

builder.Services
    .AddMcpServer()
    .WithStdioServerTransport()
    .WithToolsFromAssembly();
await builder.Build().RunAsync();

[McpServerToolType]
public static class CalculatorTool
{
    [McpServerTool, Description("Adds two numbers")]
    public static string Add(int a, int b) => $"Sum {a + b}";
}
Java
您的完整主应用程序类应如下所示:
// McpServerApplication.java
package com.microsoft.mcp.sample.server;

import org.springframework.ai.tool.ToolCallbackProvider;
import org.springframework.ai.tool.method.MethodToolCallbackProvider;
import org.springframework.boot.SpringApplication;
import org.springframework.boot.autoconfigure.SpringBootApplication;
import org.springframework.context.annotation.Bean;
import com.microsoft.mcp.sample.server.service.CalculatorService;

@SpringBootApplication
public class McpServerApplication {

    public static void main(String[] args) {
        SpringApplication.run(McpServerApplication.class, args);
    }

    @Bean
    public ToolCallbackProvider calculatorTools(CalculatorService calculator) {
        return MethodToolCallbackProvider.builder().toolObjects(calculator).build();
    }
}
Rust
Rust 服务器的最终代码应如下所示:
use rmcp::{
    ServerHandler, ServiceExt,
    handler::server::{router::tool::ToolRouter, tool::Parameters},
    model::{ServerCapabilities, ServerInfo},
    schemars, tool, tool_handler, tool_router,
    transport::stdio,
};
use std::error::Error;

#[derive(Debug, serde::Deserialize, schemars::JsonSchema)]
pub struct CalculatorRequest {
    pub a: f64,
    pub b: f64,
}

#[derive(Debug, Clone)]
pub struct Calculator {
    tool_router: ToolRouter<Self>,
}

#[tool_router]
impl Calculator {
    pub fn new() -> Self {
        Self {
            tool_router: Self::tool_router(),
        }
    }

    #[tool(description = "Adds a and b")]
    async fn add(
        &self,
        Parameters(CalculatorRequest { a, b }): Parameters<CalculatorRequest>,
    ) -> String {
        (a + b).to_string()
    }
}

#[tool_handler]
impl ServerHandler for Calculator {
    fn get_info(&self) -> ServerInfo {
        ServerInfo {
            instructions: Some("A simple calculator tool".into()),
            capabilities: ServerCapabilities::builder().enable_tools().build(),
            ..Default::default()
        }
    }
}

#[tokio::main]
async fn main() -> Result<(), Box<dyn Error>> {
    let service = Calculator::new().serve(stdio()).await?;
    service.waiting().await?;
    Ok(())
}
-7- 测试服务器
使用以下命令启动服务器:
TypeScript
npm run build
Python
mcp run server.py
使用 MCP Inspector 时,请运行
mcp dev server.py,它会自动启动 Inspector 并提供所需的代理会话令牌。如果使用mcp run server.py,您需要手动启动 Inspector 并配置连接。
.NET
确保您在项目目录中:
cd McpCalculatorServer
dotnet run
Java
./mvnw clean install -DskipTests
java -jar target/calculator-server-0.0.1-SNAPSHOT.jar
Rust
运行以下命令以格式化并运行服务器:
cargo fmt
cargo run
-8- 使用 Inspector 运行
Inspector 是一个非常棒的工具,可以启动您的服务器并与之交互,以测试其是否正常工作。让我们启动它:
!NOTE "command" 字段可能会有所不同,因为它包含运行服务器的特定运行时命令。
TypeScript
npx @modelcontextprotocol/inspector node build/index.js
或者将其添加到您的 package.json 文件中,例如:"inspector": "npx @modelcontextprotocol/inspector node build/index.js",然后运行 npm run inspector
Python 包装了一个名为 Inspector 的 Node.js 工具。可以像这样调用该工具:
mcp dev server.py
然而,它并未实现工具的所有方法,因此建议直接运行以下 Node.js 工具:
npx @modelcontextprotocol/inspector mcp run server.py
如果您使用的工具或 IDE 允许配置运行脚本的命令和参数,请确保在 Command 字段中设置 python,并在 Arguments 中设置 server.py。这样可以确保脚本正确运行。
.NET
确保您在项目目录中:
cd McpCalculatorServer
npx @modelcontextprotocol/inspector dotnet run
Java
确保您的计算器服务器正在运行,然后运行 Inspector:
npx @modelcontextprotocol/inspector
在 Inspector 网页界面中:
- 选择 "SSE" 作为传输类型
- 将 URL 设置为:
http://localhost:8080/sse - 点击 "Connect"
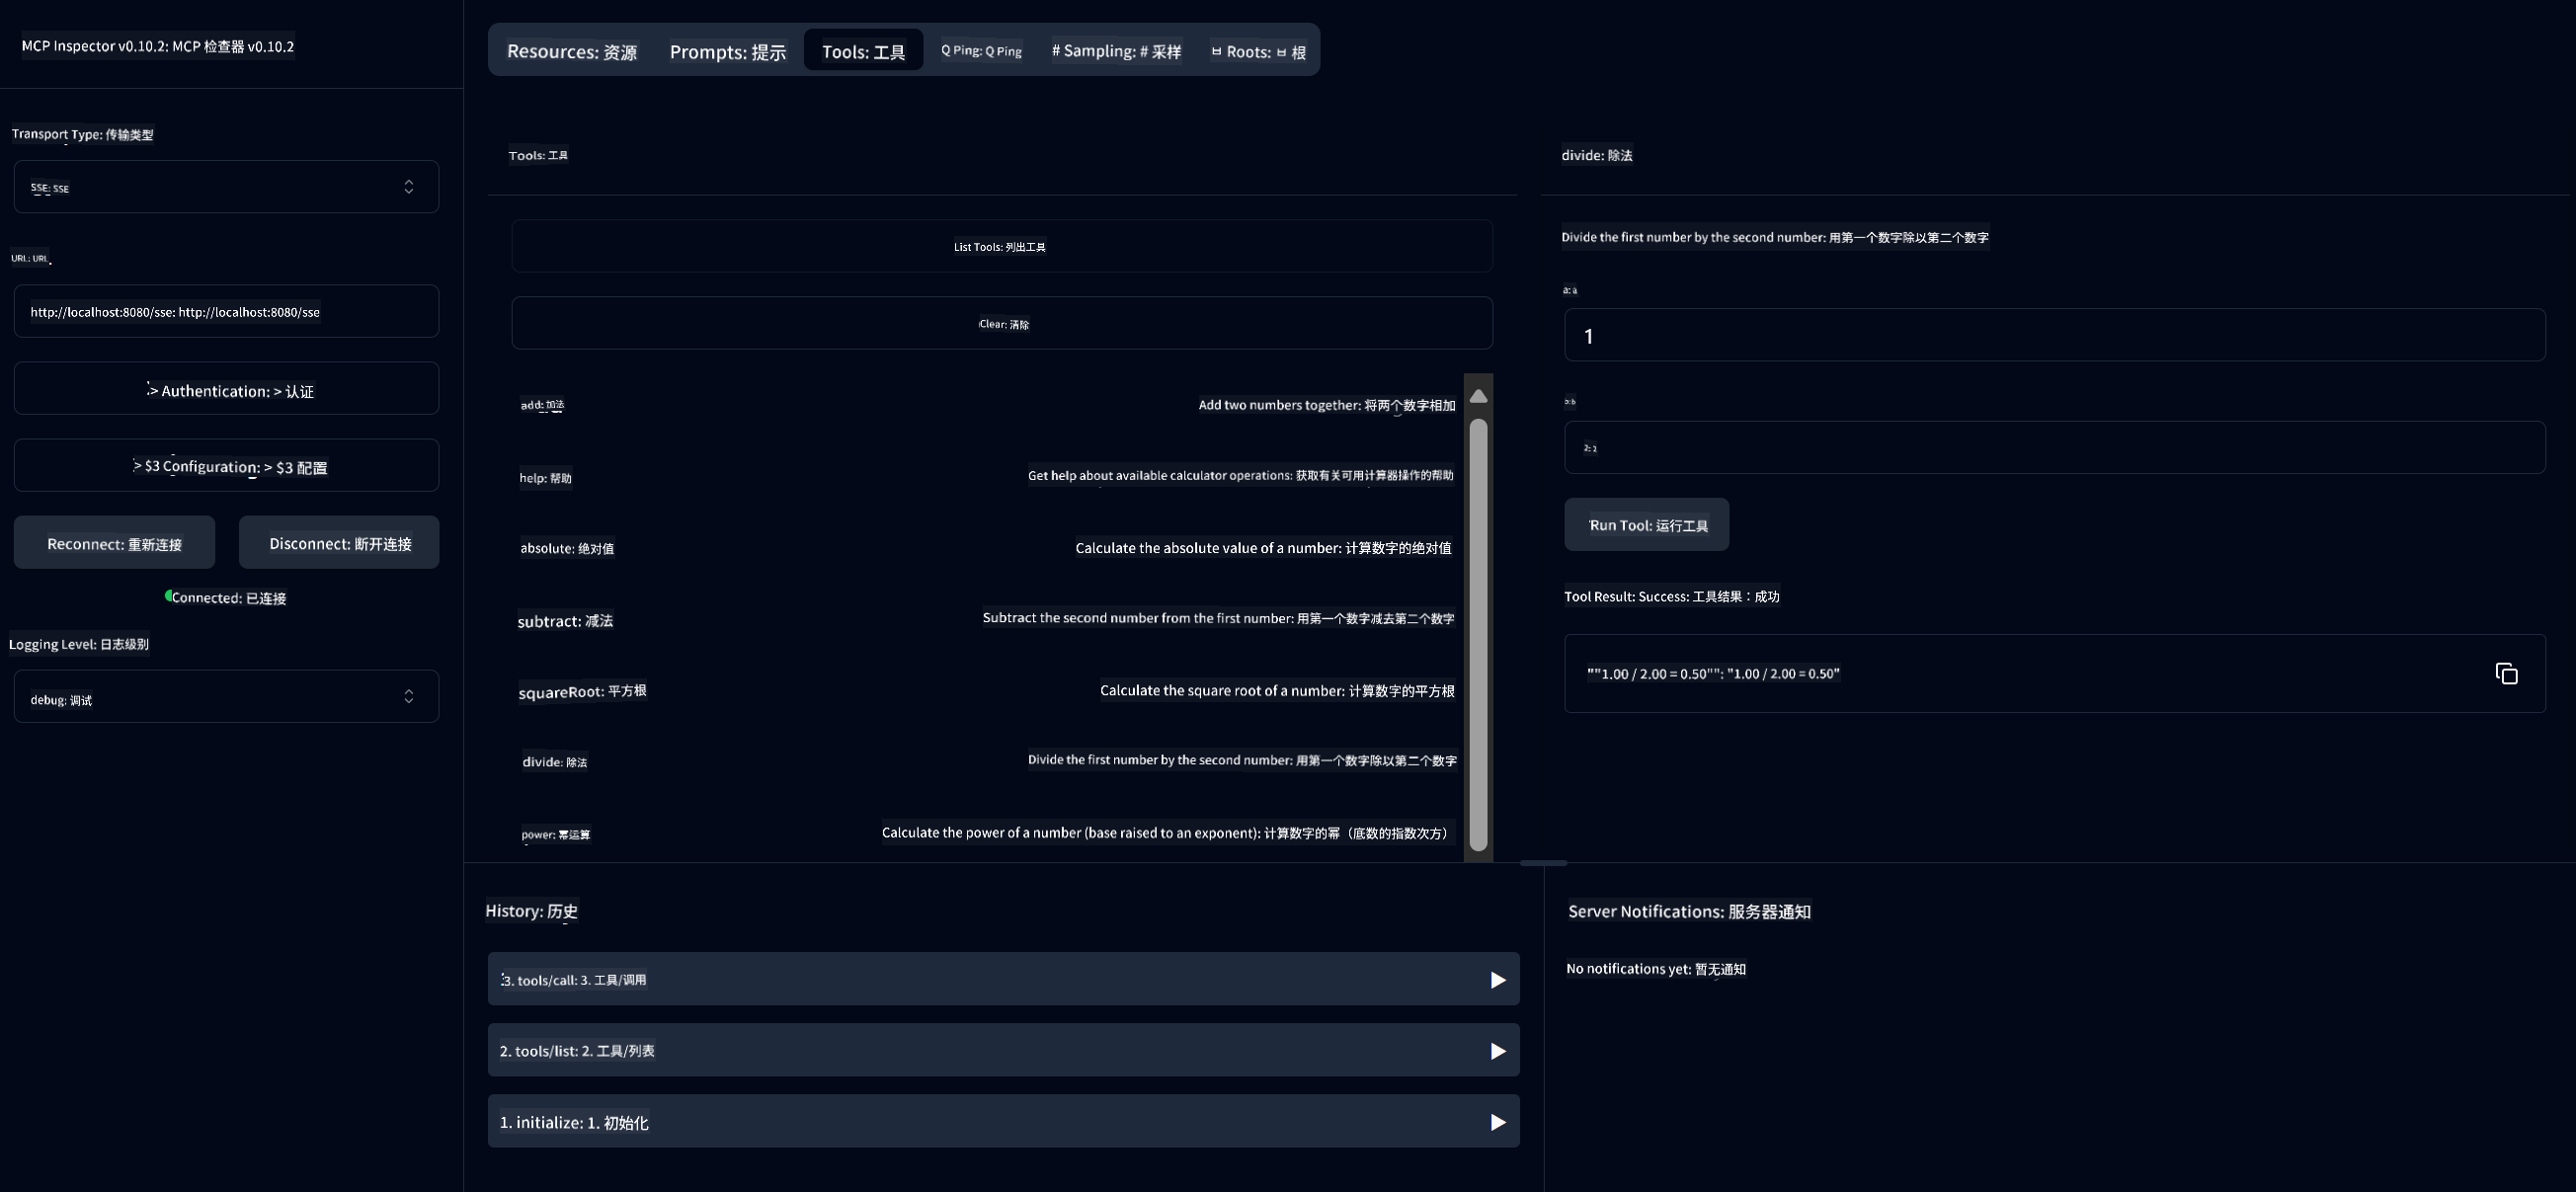
您现在已成功连接到服务器
Java服务器测试部分现已完成
接下来是与服务器交互的部分。
您应该看到以下用户界面:
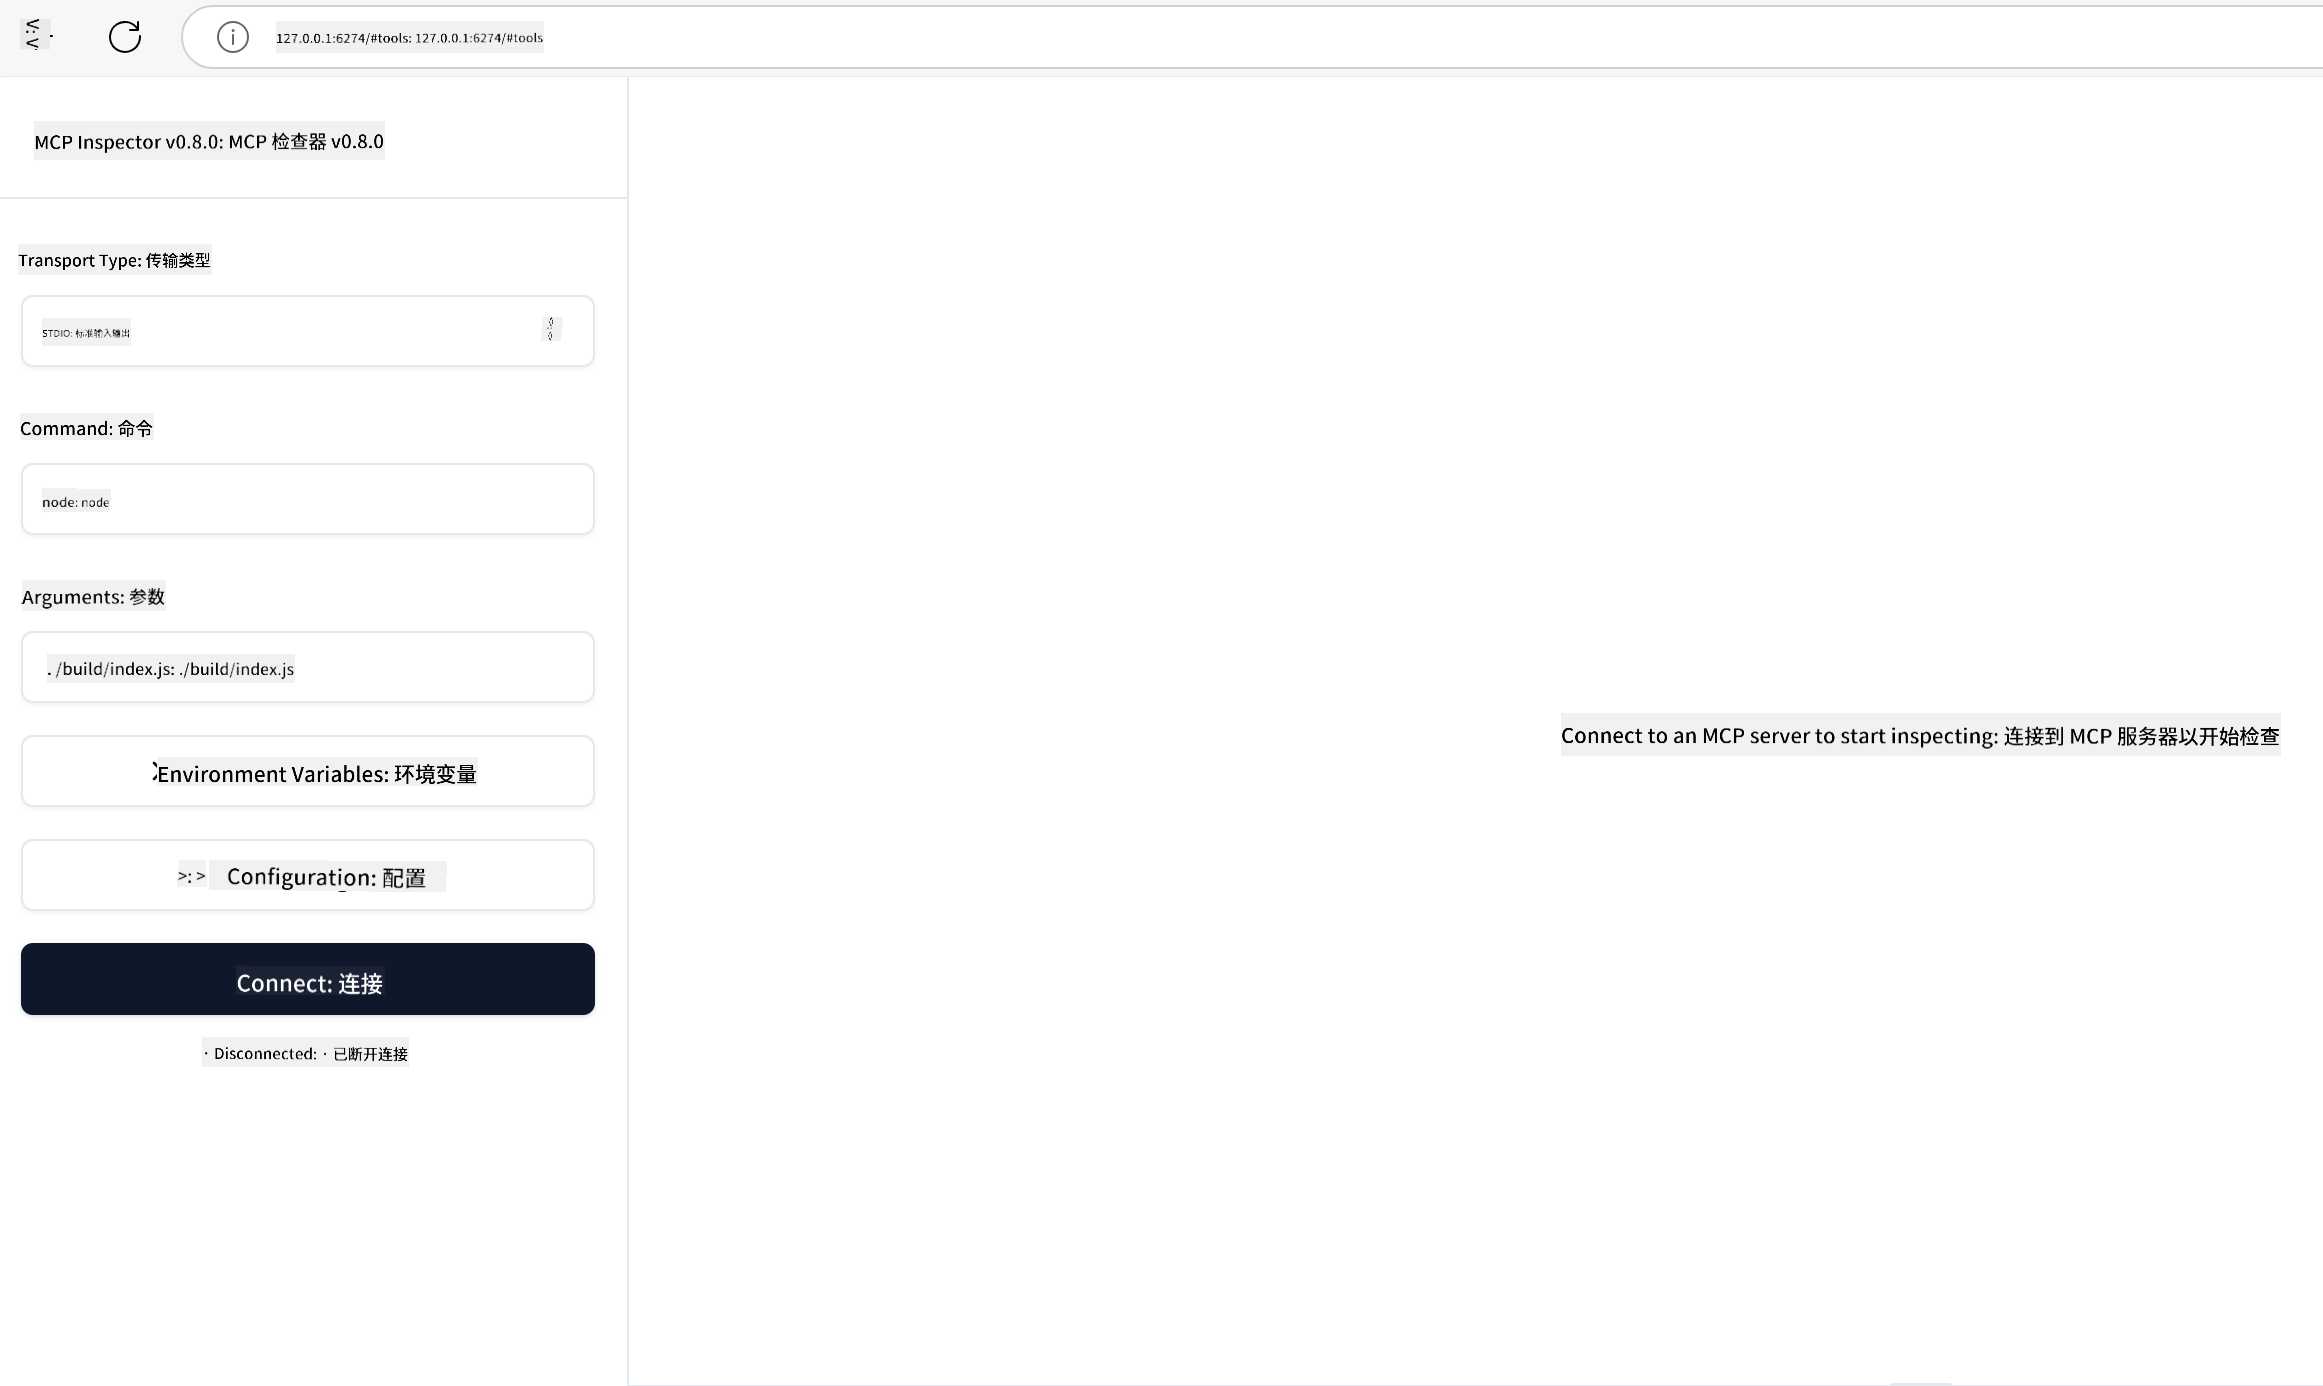
- 通过选择“连接”按钮连接到服务器
连接到服务器后,您应该看到以下内容: - 选择“工具”和“listTools”,您应该看到“添加”出现,选择“添加”并填写参数值。
您应该看到以下响应,即来自“添加”工具的结果:
恭喜您,您已经成功创建并运行了您的第一个服务器!
Rust
要使用 MCP Inspector CLI 运行 Rust 服务器,请使用以下命令:
npx @modelcontextprotocol/inspector cargo run --cli --method tools/call --tool-name add --tool-arg a=1 b=2
官方 SDK
MCP 提供了多种语言的官方 SDK:
- C# SDK - 与 Microsoft 合作维护
- Java SDK - 与 Spring AI 合作维护
- TypeScript SDK - 官方 TypeScript 实现
- Python SDK - 官方 Python 实现
- Kotlin SDK - 官方 Kotlin 实现
- Swift SDK - 与 Loopwork AI 合作维护
- Rust SDK - 官方 Rust 实现
关键要点
- 使用语言特定的 SDK 设置 MCP 开发环境非常简单
- 构建 MCP 服务器需要创建并注册具有清晰架构的工具
- 测试和调试对于可靠的 MCP 实现至关重要
示例
作业
创建一个包含您选择工具的简单 MCP 服务器:
- 使用您喜欢的语言(.NET、Java、Python、TypeScript 或 Rust)实现工具。
- 定义输入参数和返回值。
- 运行检查工具以确保服务器正常工作。
- 使用各种输入测试实现。
解决方案
其他资源
- 在 Azure 上使用 Model Context Protocol 构建代理
- 使用 Azure 容器应用程序远程 MCP(Node.js/TypeScript/JavaScript)
- .NET OpenAI MCP 代理
下一步
下一步:MCP 客户端入门
免责声明:
本文档使用AI翻译服务Co-op Translator进行翻译。尽管我们努力确保准确性,但请注意,自动翻译可能包含错误或不准确之处。应以原始语言的文档作为权威来源。对于关键信息,建议使用专业人工翻译。对于因使用本翻译而引起的任何误解或误读,我们概不负责。